

brother manual
Brother Industries‚ founded in 1908‚ is a global leader in producing high-quality printers‚ sewing machines‚ and scanners․ Known for innovation and reliability‚ their products cater to both home and professional users‚ offering durable and efficient solutions․
1․1 History of Brother Industries
Founded in 1908 by Kanekichi Yasuda in Nagoya‚ Japan‚ Brother Industries began as a sewing machine manufacturer․ Over the years‚ it diversified into printers‚ scanners‚ and fax machines‚ becoming a global brand known for innovation‚ quality‚ and reliability in both home and industrial electronics․
1․2 Overview of Brother Products
Brother Industries offers a diverse range of products‚ including printers‚ sewing machines‚ scanners‚ label makers‚ embroidery machines‚ and fax machines․ Known for durability and efficiency‚ their devices cater to both home and industrial needs‚ providing user-friendly designs and advanced features to enhance productivity and creativity across various applications․
Brother Printer Manual: Installation and Setup Guide
This guide provides step-by-step instructions for setting up Brother printers‚ including unboxing‚ network configuration‚ and software installation‚ ensuring a smooth and hassle-free experience for users․
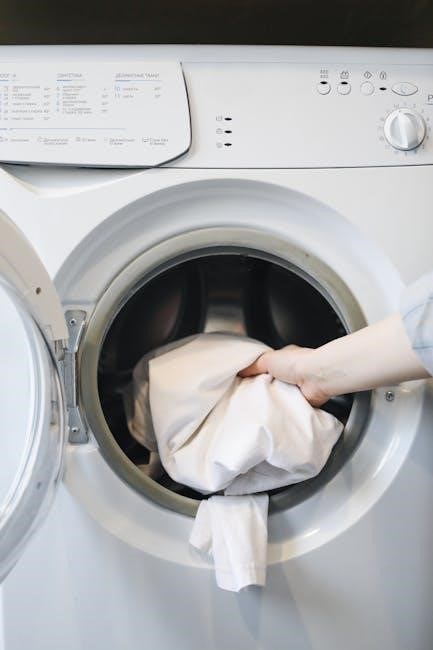
2․1 Unboxing and Initial Setup
Begin by carefully unboxing the printer‚ ensuring all accessories are included․ Connect the power cord and install ink or toner cartridges․ Place the printer on a flat surface and ensure it is level․ Follow the manual to load paper and perform the initial calibration․ This step ensures proper functionality and print quality․ Always handle cartridges carefully to avoid damage or leaks․
2․2 Connecting the Printer to a Network
To connect your Brother printer to a network‚ start by turning it on and ensuring it is in wireless mode․ Use the control panel to select your Wi-Fi network and enter the password․ For wired connections‚ use an Ethernet cable․ Ensure your router is nearby and the network name is correct․ Restarting the printer and router may resolve connectivity issues․ Always verify the network settings match your router’s configuration for a stable connection․
2․3 Installing Printer Drivers and Software
Visit the Brother support website and download the appropriate driver for your printer model․ Run the installer and follow the on-screen instructions to install the driver and software․ Ensure your printer is connected to the network during installation․ Restart both the printer and computer to complete the setup․ Always use Brother-approved drivers for optimal performance․

Brother Sewing Machine Manual: Operation and Maintenance
Welcome to the Brother Sewing Machine Manual! This guide covers basic operation‚ maintenance tips‚ and troubleshooting to ensure your machine runs smoothly and lasts longer․
3․1 Basic Operation of Brother Sewing Machines
Learn the fundamentals of operating Brother sewing machines‚ including threading‚ selecting stitches‚ and controlling sewing speed․ Easy-to-follow steps ensure smooth sewing experiences‚ from basic to advanced techniques․
3․2 Maintenance Tips for Longevity
Regular maintenance ensures optimal performance and extends the life of your Brother sewing machine․ Clean the machine regularly to remove dust and debris‚ oil moving parts to prevent friction‚ and inspect for worn needles or belts․ Store in a dry place to avoid rust․ Always follow the manual for specific care instructions․
3․3 Troubleshooting Common Issues
Common issues with Brother sewing machines include thread bunching or breaking․ Check thread tension‚ ensure proper needle size‚ and clean lint regularly․ Use genuine Brother parts for reliability․ Refer to the manual for error codes and solutions to restore smooth operation and extend machine lifespan effectively․

Brother Scanner Manual: Configuration and Use
Brother scanners are designed for ease of use‚ offering high-quality scanning solutions․ Setup involves installing drivers‚ connecting to networks‚ and configuring settings․ The manual guides users through troubleshooting and optimizing scan quality‚ ensuring efficient document and photo scanning for both home and office environments․
4․1 Setting Up the Scanner
Setting up your Brother scanner begins with unboxing and physical installation․ Connect the scanner to your computer using a USB cable or network connection․ Install the Brother Scanner Driver and software from the provided CD or official Brother website․ Follow the on-screen instructions to complete the setup․ Power on the scanner and ensure it is recognized by your device․ Finally‚ calibrate the scanner if necessary to ensure optimal performance and image quality․ Proper setup ensures seamless integration with your workflow․
4․2 Scanning Documents and Photos
Place your document or photo face down on the scanner glass․ Select the scan type (document‚ photo‚ or custom) and choose settings like resolution and file format․ Preview the scan‚ adjust as needed‚ and start scanning․ Save the file to your desired location․ Ensure proper alignment and clean the scanner regularly for clear results․
4․3 Integrating with Software Applications
Install the Brother scanner driver and software to connect with applications like Adobe Acrobat or Microsoft Office․ Configure settings to automatically save scans to cloud storage or email․ Use OCR (Optical Character Recognition) to convert scanned documents into editable text․ Ensure compatibility with third-party apps for seamless integration and efficient document management workflows․
Brother Fax Machine Manual: Sending and Receiving Faxes
Learn how to set up‚ send‚ and receive faxes with Brother machines․ Follow step-by-step guides for dialing‚ scanning documents‚ and ensuring clear connections for reliable communication․
5․1 Setting Up the Fax Machine
Setting up your Brother fax machine involves connecting the power cord‚ installing the print cartridge‚ and configuring basic settings․ Ensure the machine is plugged into a stable power source and follow the on-screen instructions to set the date‚ time‚ and fax number for seamless operation․
5․2 Sending Faxes
Enter the recipient’s fax number using the dial pad‚ then insert the document face down in the automatic document feeder or glass․ Press Start to send․ For manual sending‚ dial the number and press Start when connected․ Ensure the document is aligned properly and confirm transmission success through the confirmation report․
5․3 Receiving Faxes
Ensure the fax machine is powered on and connected to a working phone line․ Set the machine to Auto Answer mode or enable fax reception․ For manual reception‚ wait for the fax tone‚ then press Start to receive․ Adjust sensitivity settings if needed for clearer reception and confirm receipt via the confirmation report․
Brother Label Maker Manual: Label Creation and Printing
Connect your Brother label maker‚ design labels using the software‚ and print with ease․ Ensure labels are aligned and the ribbon is correctly installed for clear output․
6․1 Installing the Label Maker
Unbox and carefully remove the label maker from packaging․ Connect the power cord to a nearby outlet․ Install the Brother P-Touch software from the provided CD or download it from the official website․ Ensure the label maker is turned on and follow on-screen instructions to complete the installation process successfully․
6․2 Creating and Printing Labels
Launch the Brother P-Touch software and select a label template․ Input your text‚ symbols‚ or images‚ then preview the design․ Insert the appropriate tape cassette into the label maker․ Adjust settings like font size and alignment․ Print your label by pressing the print button․ Ensure the machine is properly aligned for clear output․
6․3 Customizing Labels
Customize labels by selecting fonts‚ symbols‚ and layouts in Brother’s P-Touch software․ Add images or logos for a personal touch․ Adjust margins and spacing to optimize text fit․ Use the preview feature to ensure accuracy before printing․ Experiment with different templates and styles to create professional-looking labels tailored to your needs․
Brother Embroidery Machine Manual: Design and Stitching
Brother Embroidery Machine Manual guides users through design creation‚ stitching techniques‚ and customization․ Perfect for beginners and advanced users‚ it offers practical steps for stunning embroidery results․
7․1 Setting Up the Embroidery Machine
Begin by unpacking and placing the machine on a stable surface․ Connect the power cord and ensure all components are included․ Install the embroidery arm‚ hoops‚ and stabilizer․ Follow manual instructions for threading and testing stitches․ Calibrate the machine if necessary‚ then load your embroidery design to start stitching․
7․2 Importing and Editing Designs
To import designs‚ connect your embroidery machine to a computer via USB or use embroidery software․ Select and transfer ․PES or ․DST files․ Edit designs by resizing‚ rotating‚ or adjusting thread colors․ Use the touchscreen or software to customize elements like stitches or patterns; Save the edited design to ensure compatibility with your Brother embroidery machine․
7․3 Stitching and Monitoring Progress
Once the design is loaded‚ start the stitching process․ Monitor progress via the machine’s LCD screen‚ which displays stitch count and completion percentage․ Use pause and resume functions for thread changes․ Ensure fabric is taut and threads are properly loaded․ Regularly check stitching quality and adjust settings if necessary for optimal results․
Brother Sewing Machine Error Codes: Solutions and Fixes
Brother sewing machines display error codes for troubleshooting․ Common issues include thread jams or bobbin problems․ Refer to the manual for specific codes and step-by-step solutions to resolve them effectively․
8․1 Common Error Codes
Brother sewing machines display specific error codes like E1‚ E3‚ and E6‚ indicating issues such as thread jams‚ bobbin errors‚ or needle problems․ These codes guide users to resolve common operational issues quickly by following the troubleshooting steps outlined in the manual‚ ensuring smooth and uninterrupted sewing experiences․
8․2 Troubleshooting Techniques
Troubleshooting Brother sewing machines involves checking power connections‚ ensuring proper threading‚ and clearing jams․ Updating software‚ resetting the machine‚ and cleaning internal components often resolve issues․ Referencing the manual’s diagnostic guides helps identify and fix errors efficiently‚ ensuring optimal performance and extending the machine’s lifespan․
8․3 Resetting the Machine
Resetting a Brother sewing machine often involves powering it off‚ then pressing and holding specific buttons while turning it back on․ This process restores default settings‚ resolving software glitches․ For detailed steps‚ refer to the manual‚ as reset procedures may vary by model to ensure proper functionality and maintain performance quality․

Brother Printer Error Codes: Diagnosis and Repair
Brother printers display error codes to indicate issues like paper jams or ink problems․ Diagnosing these codes helps identify and repair faults‚ ensuring smooth operation․
9․1 Understanding Error Codes
Brother printer error codes are alphanumeric messages indicating specific issues‚ such as paper jams or low ink levels․ Each code corresponds to a particular problem‚ guiding users to identify and address the root cause․ For accurate diagnosis‚ refer to the official Brother manual or support website for detailed explanations and solutions․
9․2 Resetting the Printer
Resetting a Brother printer can resolve common issues like error codes or connectivity problems․ Turn off the printer‚ then press and hold specific buttons (varies by model) while turning it back on․ Release the buttons as instructed to perform a partial or factory reset‚ restoring default settings for troubleshooting․ Consult the manual for exact steps․
9․3 Advanced Repair Techniques
For advanced repair‚ update the printer’s firmware to fix bugs and improve performance․ Perform a deep cleaning of the print head to remove dried ink clogs․ Replace worn-out parts such as rollers or fuser units․ Utilize diagnostic tools to pinpoint issues․ Always consult the manual regularly for model-specific guidance to prevent damage․
Brother Product Warranty and Customer Support
Brother provides a limited warranty for products‚ covering manufacturing defects․ Customer support is available 24/7 via phone‚ email‚ and live chat‚ with online resources and FAQs․
10․1 Warranty Information
Brother offers a limited warranty covering manufacturing defects for a specified period․ Products are free from defects in material and workmanship under normal use․ Warranty terms vary by product type and region‚ with details provided in the official Brother manual or website․ Extended warranties may be available for purchase․
10․2 Contacting Customer Support
Brother provides multiple channels for customer support‚ including phone‚ email‚ and live chat․ Users can access support through the official website‚ where regional contact details are available․ Additionally‚ online resources and FAQs are accessible to address common queries and troubleshooting needs effectively․
10․3 Online Resources and Manuals
Brother offers comprehensive online resources‚ including downloadable manuals and guides․ Users can access product-specific instructions‚ troubleshooting tips‚ and software updates․ The official website features a dedicated support section‚ ensuring easy navigation and quick solutions to enhance user experience with Brother devices․

Brother Product Comparison: Which One is Right for You?
Brother offers a diverse range of products tailored to different needs․ Comparing printers‚ sewing machines‚ scanners‚ and more helps users choose the best fit for their specific requirements and preferences․
11․1 Printers vs․ Sewing Machines
Brother printers and sewing machines cater to different needs․ Printers offer versatile printing solutions for documents and photos‚ while sewing machines provide advanced stitching capabilities for fabric crafts․ Both products are known for their durability and user-friendly interfaces‚ making them ideal for home and professional environments․ Each serves a unique purpose‚ ensuring optimal performance in their respective fields․
11․2 Scanners vs․ Fax Machines
Brother scanners and fax machines serve distinct purposes․ Scanners efficiently digitize documents‚ offering high-resolution imaging and integration with software․ Fax machines provide reliable communication for sending and receiving faxes‚ ensuring secure and traditional document transmission; Both devices are designed for productivity but cater to different needs in office and home environments․
11․3 Label Makers vs․ Embroidery Machines
Brother label makers are designed for efficient labeling‚ offering crisp text and integration with software for customization․ Embroidery machines‚ however‚ focus on intricate stitching and fabric decoration‚ ideal for crafting and fashion․ Both tools enhance productivity and creativity but cater to entirely different needs‚ from organization to artistic expression․

Brother Product Accessories and Consumables
Brother offers a range of accessories‚ including toner cartridges‚ ink‚ sewing needles‚ threads‚ and labels․ These consumables ensure optimal performance and longevity for their respective devices․
12․1 Toner Cartridges and Ink
Brother toner cartridges and ink are designed for high-quality printing․ They offer vibrant colors and sharp text․ Regular replacement ensures optimal performance․ Genuine Brother supplies are recommended for longevity and reliability‚ enhancing print quality and reducing maintenance needs over time․
12․2 Sewing Needles and Threads
Brother sewing machines require specific needles and threads for optimal performance․ Using high-quality‚ compatible needles ensures precise stitching and reduces fabric damage․ Thread selection varies by fabric type‚ with cotton and polyester blends being popular choices․ Regularly changing needles and using the right thread extends machine longevity and enhances sewing quality․
12․3 Labels and Ribbons
Brother label makers use high-quality labels and ribbons for crisp‚ durable prints․ Choose from various label sizes and materials‚ including paper‚ vinyl‚ and thermal options․ Replace ribbons regularly to maintain print clarity․ Proper storage and handling of labels and ribbons ensure optimal performance and extend the life of your Brother label maker․
Brother manuals provide comprehensive guides for optimal product use‚ ensuring reliability and innovation․ From printers to sewing machines‚ Brother products are designed for user-friendliness and durability․ By following these manuals‚ users can maximize efficiency and creativity․ Explore the manuals to unlock your Brother device’s full potential and enjoy seamless performance for years to come․